How to Create Projects
Before creating your first project, decide how you want to add your code to CybeDefend:- Recommended: Link a Git Provider
Connect your GitHub or GitLab account to seamlessly import repositories. See our integration guides: - Alternatively: Upload a ZIP
You can upload your code in a zip file for quick or offline testing. We strongly recommend connecting a Git repository for the best DevSecOps experience.
Steps to Create a Project
1. Navigate to Create Project
In your organization’s home page, click Create Project.2. Select Your Method
Choose how you want to add your code:Option A: Connect with GitHub
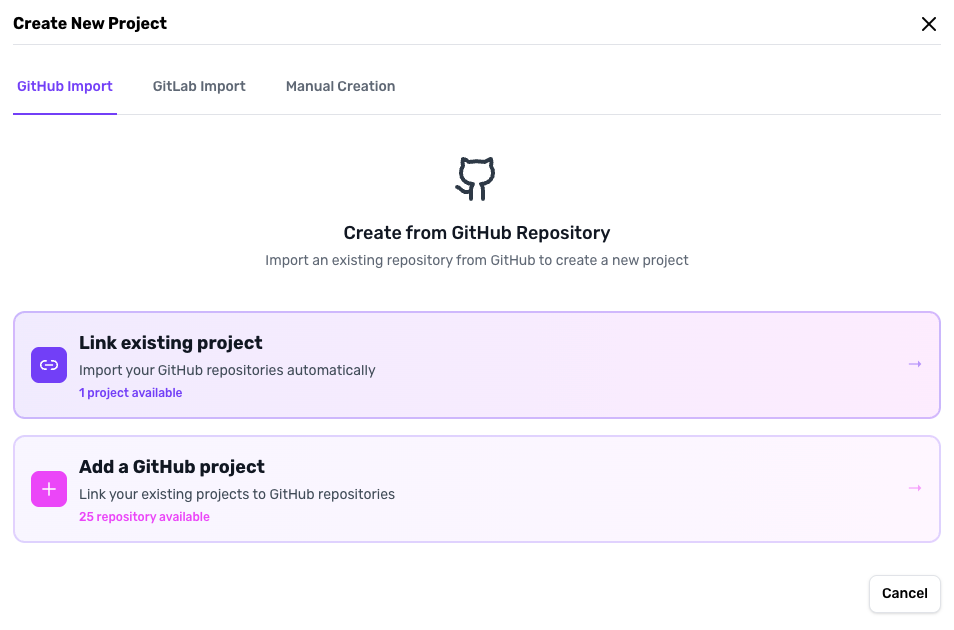
- Click Continue with GitHub
- Select your repository from the dropdown
- Assign it to a specific team
- Configure scan parameters
Option B: Connect with GitLab
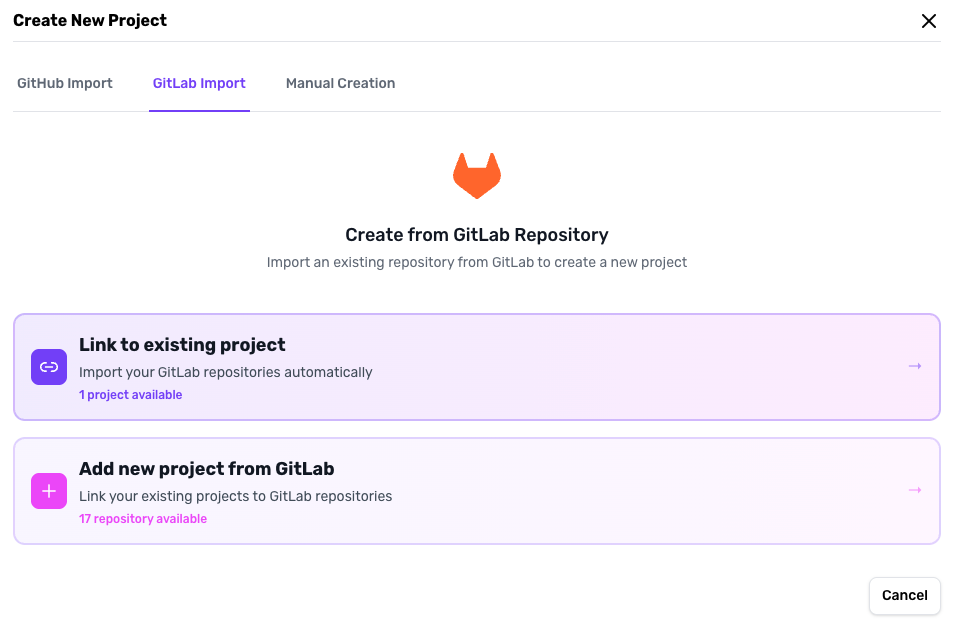
- Click Continue with GitLab
- Select your repository from the dropdown
- Assign it to a specific team
- Configure scan parameters
Option C: Upload ZIP
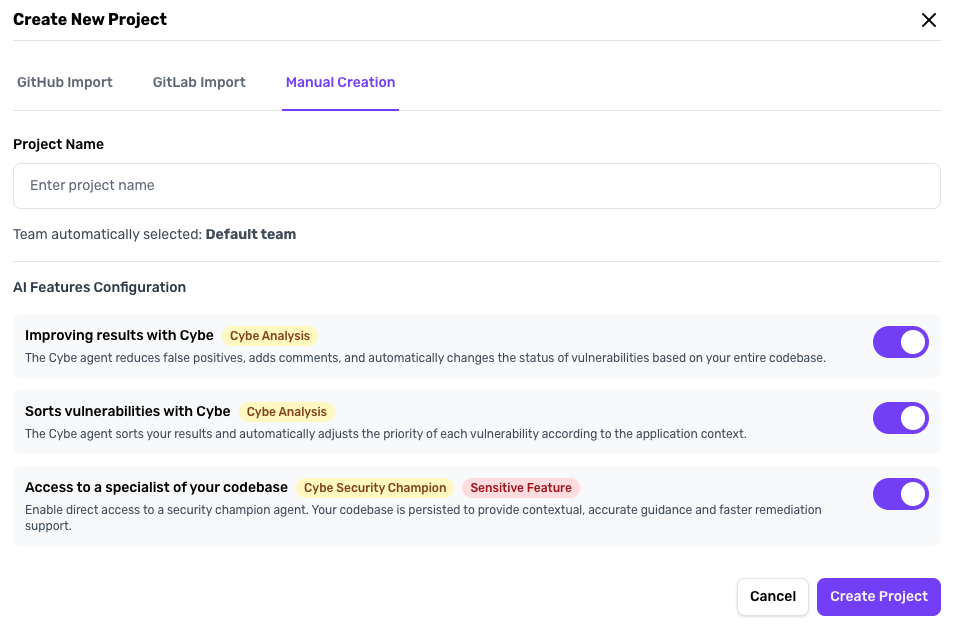
- Click Upload ZIP
- Provide your code archive
- Assign to a team
- Configure scan parameters
3. Configure Scan Parameters
Adjust scanning settings based on your needs:- Severity levels: Choose which vulnerabilities to detect
- Scanner types: SAST, SCA, IaC, Container
- Advanced options: Enable Cybe Analysis etc.
What Happens After Creation?
Once your project is created:- Initial Scan Starts: CybeDefend automatically begins scanning your code
- Vulnerabilities Detected: Results appear in your project dashboard
Related: Connect GitHub · Connect GitLab · Scan Parameters · Cybe Analysis