1. Scanning Frequency
Define how often you want CybeDefend to run scans on your repositories or projects. This can be set to daily, weekly, monthly, or manual to meet your workflow requirements.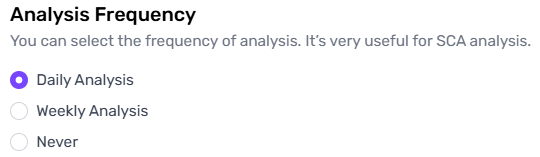
Frequent scans ensure earlier detection of new vulnerabilities, minimizing the risk of security issues going undetected.
2. Vulnerability Severity Choice
Choose which severity levels (e.g., Low, Medium, High, Critical) are included in your scan results. Unchecked severities are not recorded, which helps you focus on higher-priority vulnerabilities without affecting scan duration.
This setting only filters scan results; it does not impact the actual scanning time or depth.
3. Type of Scanning
CybeDefend supports multiple scanning methods. You can enable any or all methods based on your project needs:- SAST (Static Application Security Testing):
Analyzes source code for security flaws before runtime. - IAC (Infrastructure as Code):
Detects misconfigurations in your infrastructure (e.g., Terraform, Kubernetes). - SCA (Software Composition Analysis):
Inspects open-source dependencies and libraries for known vulnerabilities.
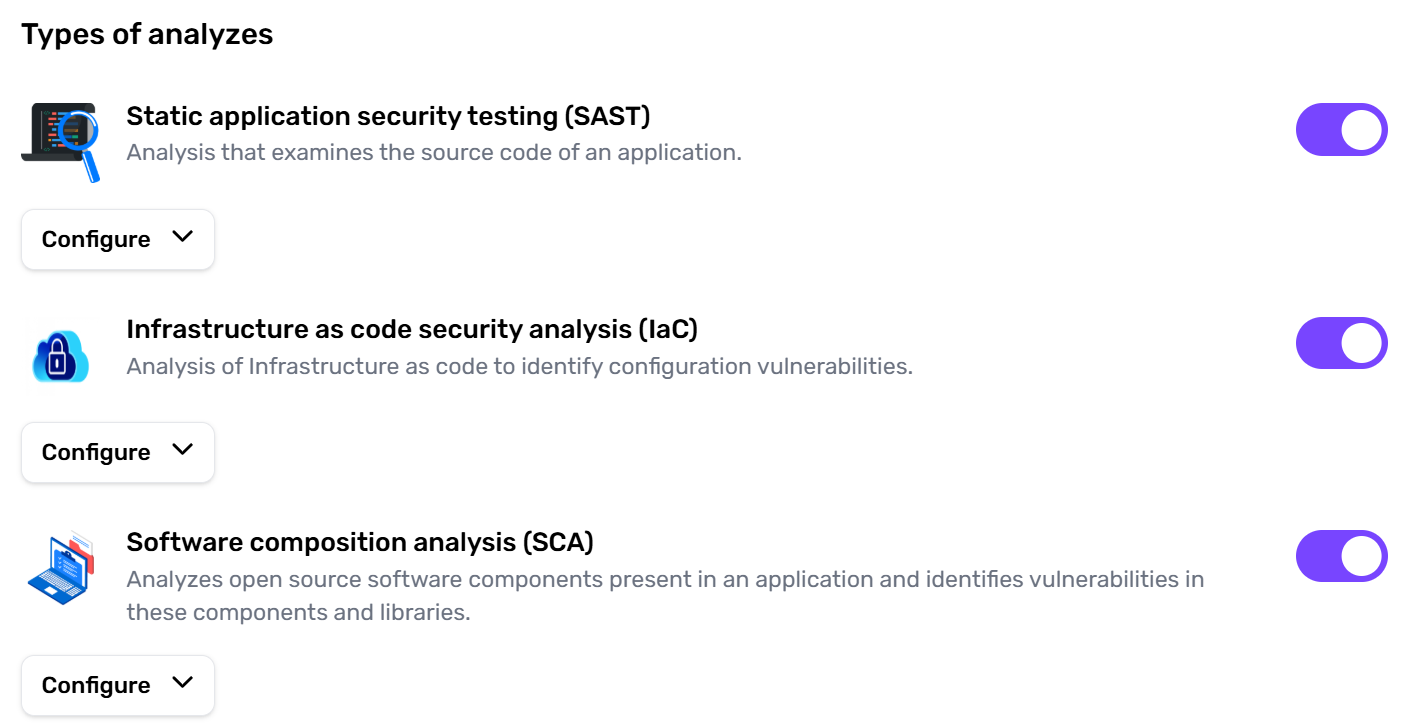
We recommend activating all scans for a thorough security posture—unless you have a specific reason to skip one.
4. SAST Fast Scanning (SAST Only)
Enable a fast version of SAST if you need quick feedback:- Uses fewer scanners, reducing scan time.
- Potentially yields fewer reported vulnerabilities (some deeper checks are disabled).
- Applicable only if SAST is enabled.
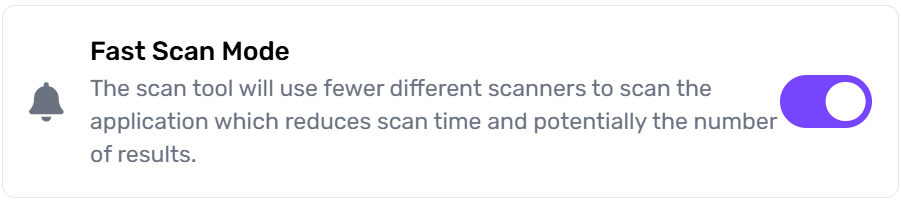
Fast scanning is best for early-stage development or quick checks. For production releases, we strongly suggest the full SAST scan.
5. Dataflow Option (SAST Only, Powered by CybeDefend AI)
When SAST is enabled, you can activate CybeDefend AI’s dataflow analysis to trace how a variable-based vulnerability travels throughout your codebase. This helps you understand where the vulnerability starts and how it propagates.
Visit our Dataflow Analysis page to learn more about how variables are traced, from source to sink.
Next Steps
- Save Your Changes: After adjusting these parameters, remember to save your project settings.
- Trigger a Scan: Run a new scan or wait until the next scheduled frequency to see updated results.
- Review Reports: Check the scan report to ensure everything is configured as expected.
Balancing scan speed and thoroughness is key. Experiment with different settings to find the right configuration for your team’s workflow.