> ## Documentation Index
> Fetch the complete documentation index at: https://docs.cybedefend.com/llms.txt
> Use this file to discover all available pages before exploring further.
# Connect GitLab Account to CybeDefend
> Authorize and install the CybeDefend GitLab integration to link your repositories for static code scanning.
To begin performing **static code scans** on your GitLab repositories with CybeDefend, you'll need to **authorize** and **install** our GitLab integration. Once installed, your repositories will be accessible when creating new projects in CybeDefend.
 ***
## 1. Access Organization Integrations
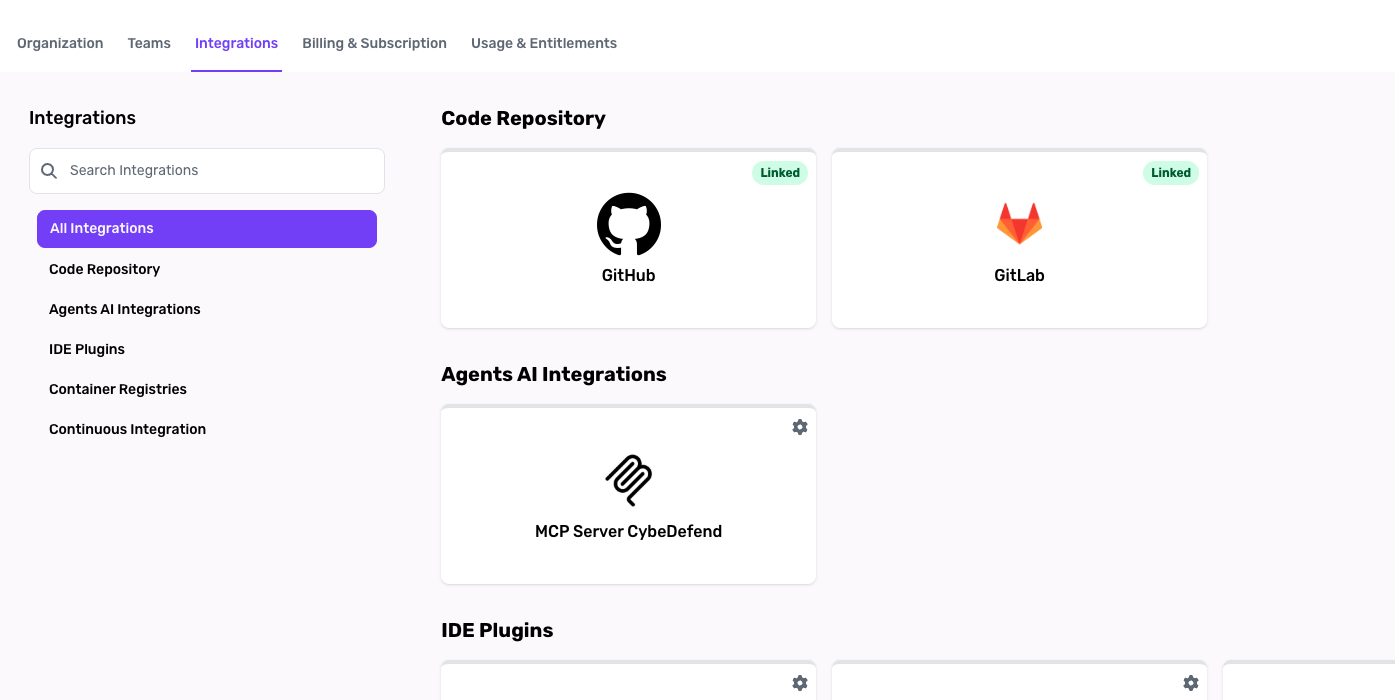
1. **Navigate to "Integration Settings"**
Go to your Organization's settings > Integrations.
2. **Search for "GitLab"**
Within that section, choose the **GitLab** option for installation instructions.
3. **Click "Install & Authorize"**\
You'll be redirected to GitLab's official authorization flow.
You must have Administrator or Manager privileges in CybeDefend to add integrations.
***
## 2. Install & Authorize CybeDefend on GitLab
When GitLab prompts you to authorize **CybeDefend**:
1. **Choose Repositories**\
Select either all or specific repositories to grant CybeDefend read access.
2. **Confirm Permissions**\
We need at least read access for scanning. Write access is optional but enables advanced features like **Auto-Fix Merge Requests**.
3. **Complete Installation**\
Wait a few seconds for GitLab to finalize authorization.
If you have organizational policies restricting third-party integrations, contact your GitLab Admin to approve CybeDefend's access.
***
## 3. Linking Repositories to Your Projects
After installation, you can associate any authorized repository with a **new project** in CybeDefend:
* **Go to "Create Project"**: Navigate to [Create Project](/latest/get-started/project-management/create-project).
* **Select "Continue with GitLab"**: Your authorized repos will appear in a dropdown.
* **Choose Your Repo**: Pick a repository, assign it to a team, and configure scanning parameters.
If you just installed the integration, it may take a few moments before your repositories become visible in the "Create Project" flow.
***
**Related:** [Connect GitHub](/latest/get-started/connect-your-source-code/connect-github) · [Create a Project](/latest/get-started/project-management/create-project) · [Cybe AutoFix](/latest/agent-ai-integration/cybe-autofix-detail)
***
## 1. Access Organization Integrations
1. **Navigate to "Integration Settings"**
Go to your Organization's settings > Integrations.
2. **Search for "GitLab"**
Within that section, choose the **GitLab** option for installation instructions.
3. **Click "Install & Authorize"**\
You'll be redirected to GitLab's official authorization flow.
You must have Administrator or Manager privileges in CybeDefend to add integrations.
***
## 2. Install & Authorize CybeDefend on GitLab
When GitLab prompts you to authorize **CybeDefend**:
1. **Choose Repositories**\
Select either all or specific repositories to grant CybeDefend read access.
2. **Confirm Permissions**\
We need at least read access for scanning. Write access is optional but enables advanced features like **Auto-Fix Merge Requests**.
3. **Complete Installation**\
Wait a few seconds for GitLab to finalize authorization.
If you have organizational policies restricting third-party integrations, contact your GitLab Admin to approve CybeDefend's access.
***
## 3. Linking Repositories to Your Projects
After installation, you can associate any authorized repository with a **new project** in CybeDefend:
* **Go to "Create Project"**: Navigate to [Create Project](/latest/get-started/project-management/create-project).
* **Select "Continue with GitLab"**: Your authorized repos will appear in a dropdown.
* **Choose Your Repo**: Pick a repository, assign it to a team, and configure scanning parameters.
If you just installed the integration, it may take a few moments before your repositories become visible in the "Create Project" flow.
***
**Related:** [Connect GitHub](/latest/get-started/connect-your-source-code/connect-github) · [Create a Project](/latest/get-started/project-management/create-project) · [Cybe AutoFix](/latest/agent-ai-integration/cybe-autofix-detail)